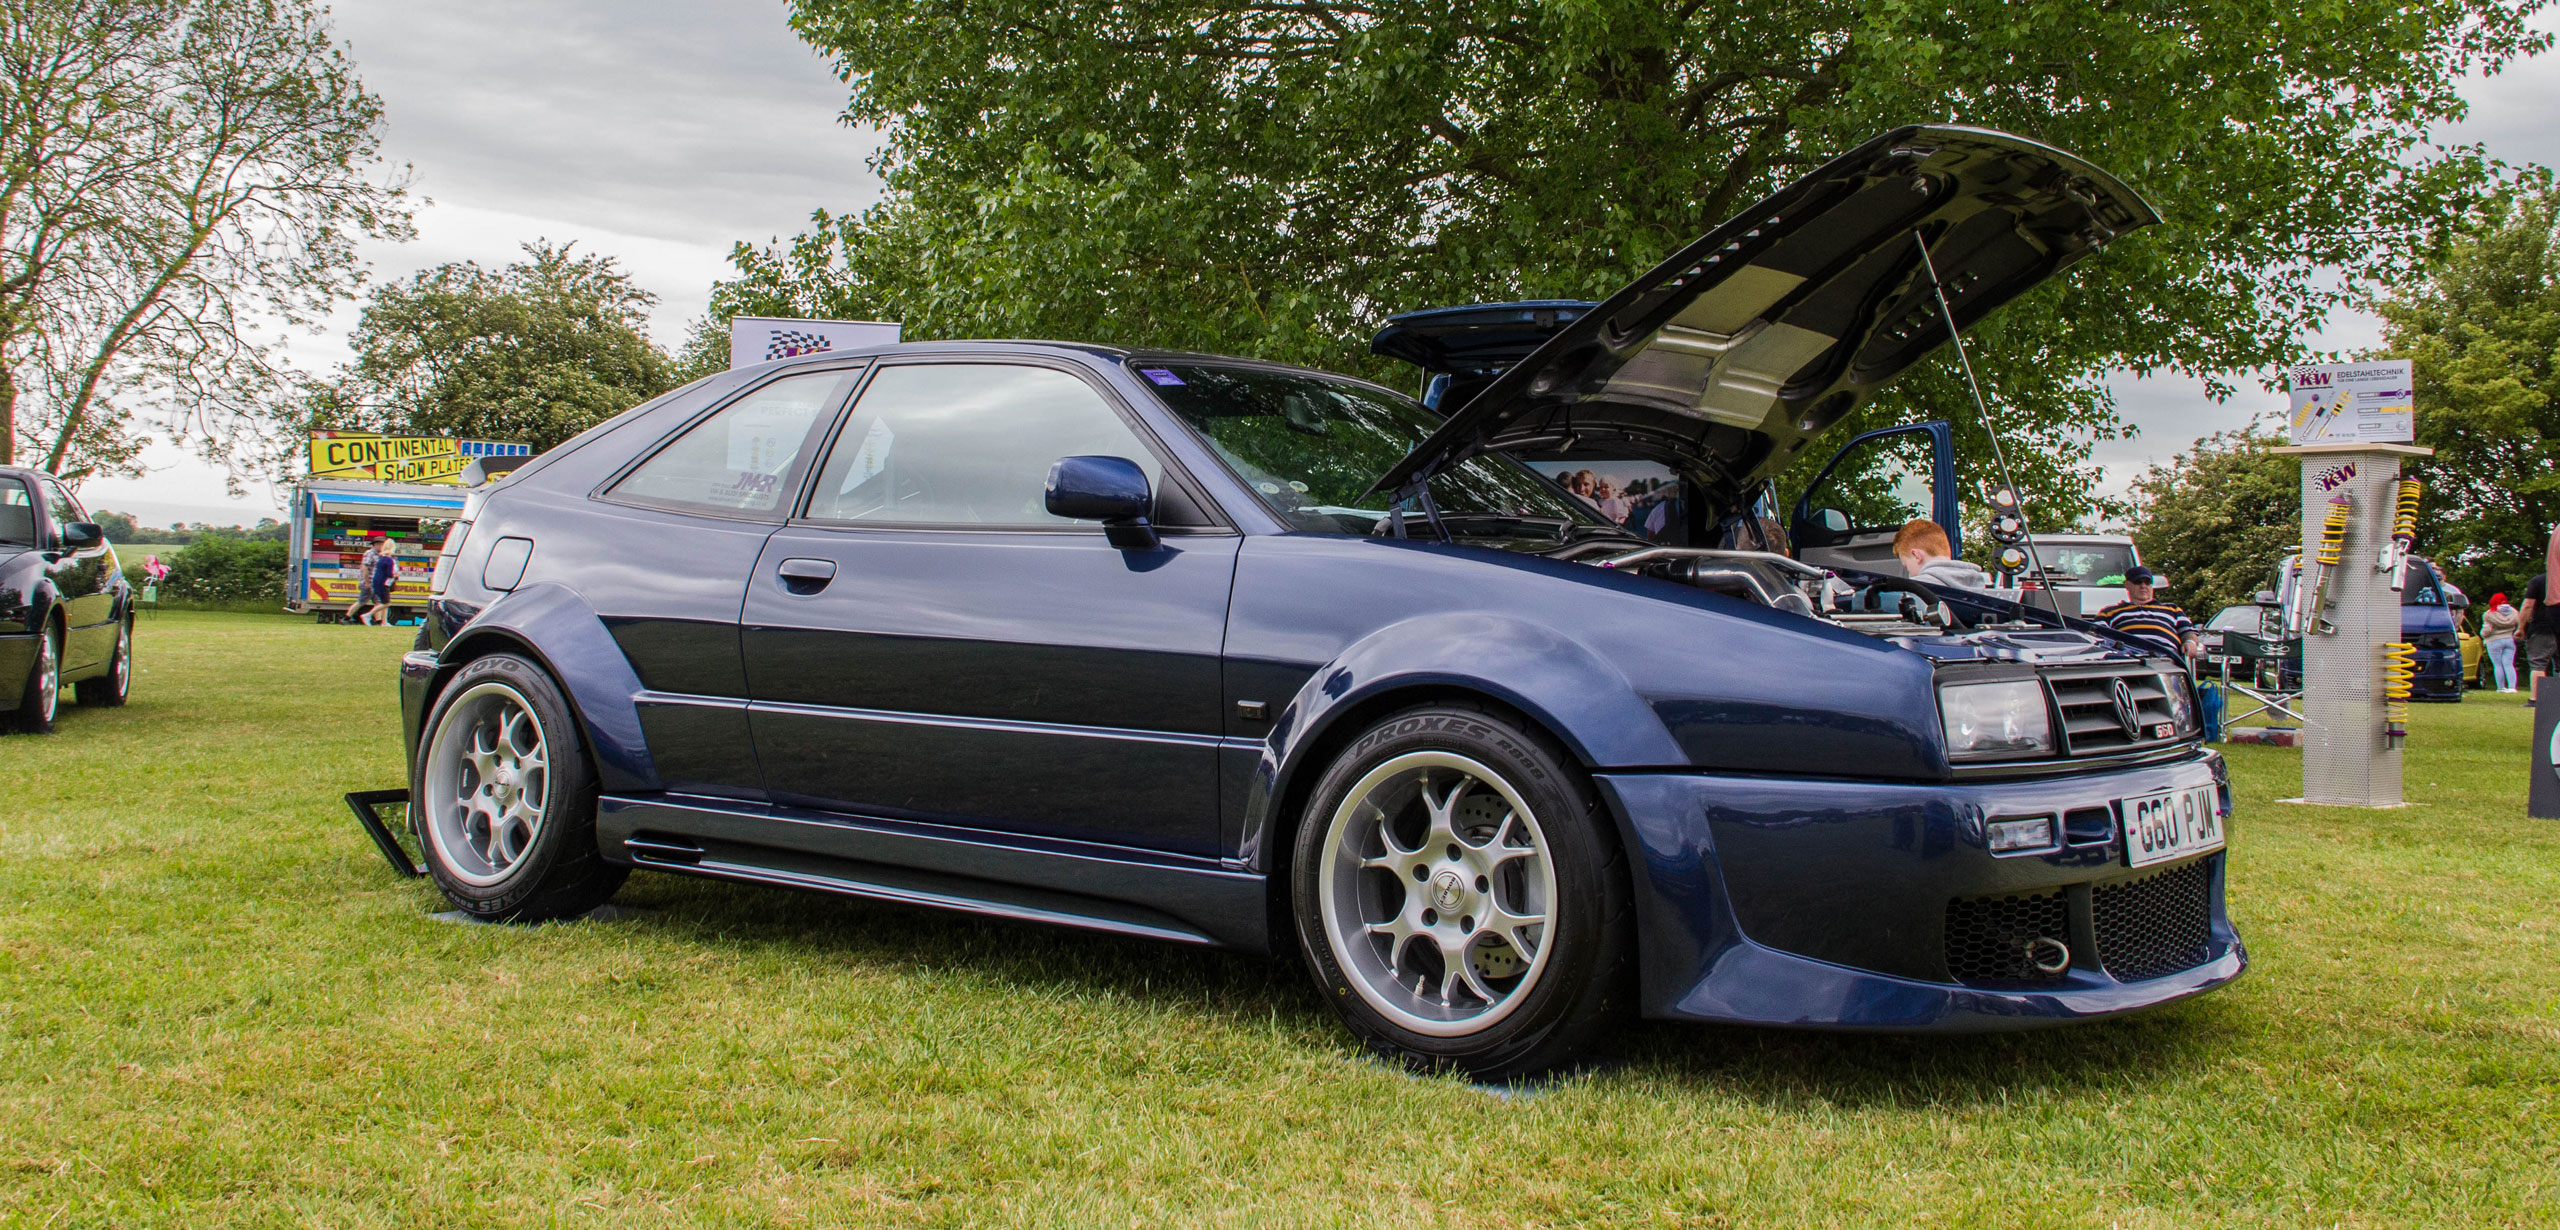
JMR WIDE ARCH CORRADO
Phase 1
We enter this first phase of development with engine, transmission & suspension sorted, but with a need for more grip. Tyre choice for the smaller diameter wheels, in this case 16”, is somewhat limited. At this point we were running 7.5 x16 on the front and 9x16 rear, staggered setup, with Toyo Proxes T1R tyres. In the dry these were offering insufficient grip and we won’t even talk about the wet scenario, other than to say, they would give Torville & Dean a run on “creativity”! So with over 500 BHP to control, grip certainly needed to be addressed.
A wheel tyre re-think was in order, as indeed the existing set whilst ok’ish with 300BHP 16VG60, it wasn’t cutting it with the 16V Turbo even with 4WD. So it was decided to run a bigger footprint with more rubber and to explore the tyre options of R888’s and AD08’s with 225/40/16’s all round on 9.5”x 16 wheels.
Clearly this was going to require modified bodywork to cover the wider track and therein the search began to find a suitable kit.
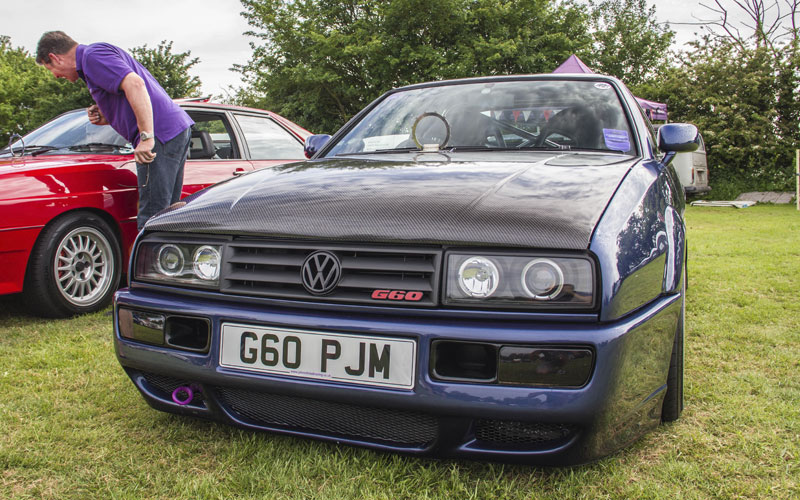
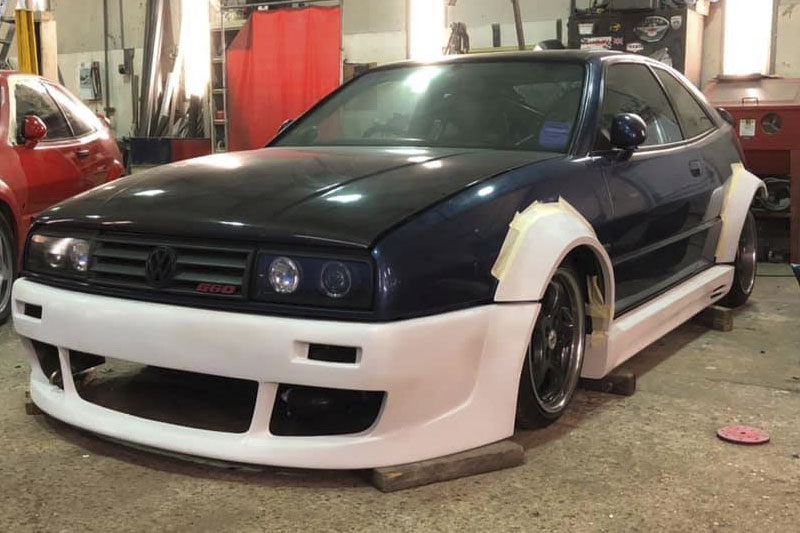
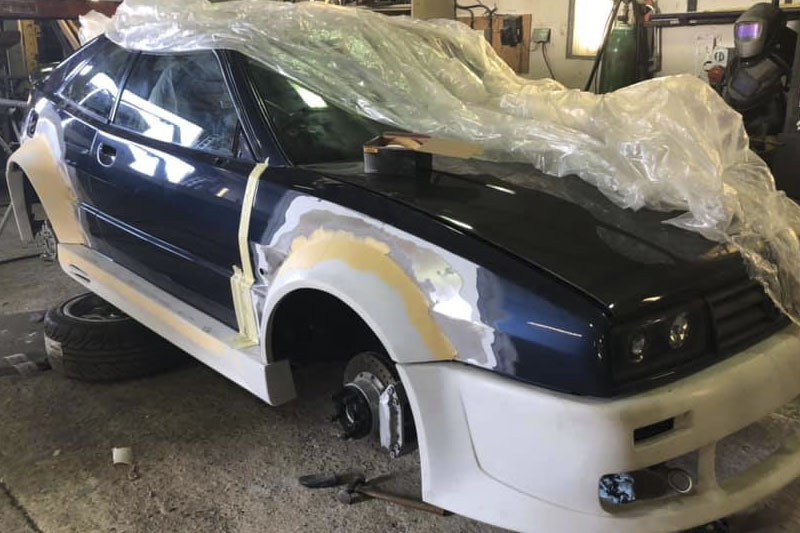
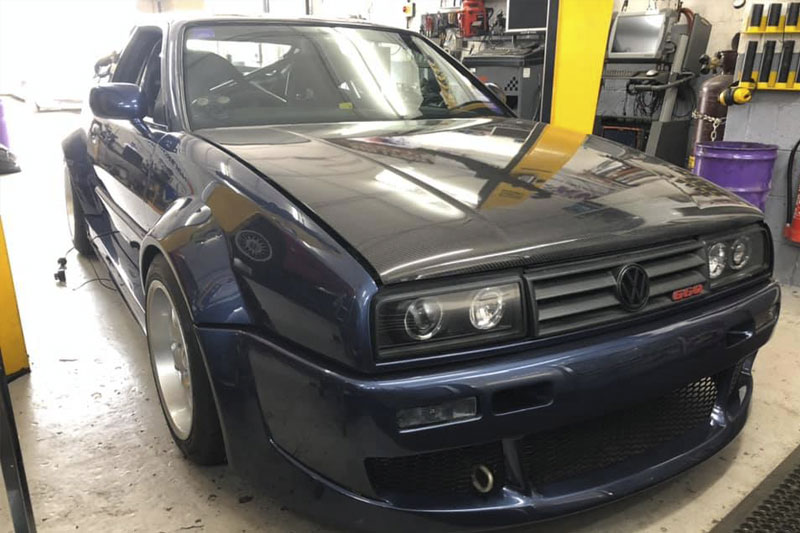
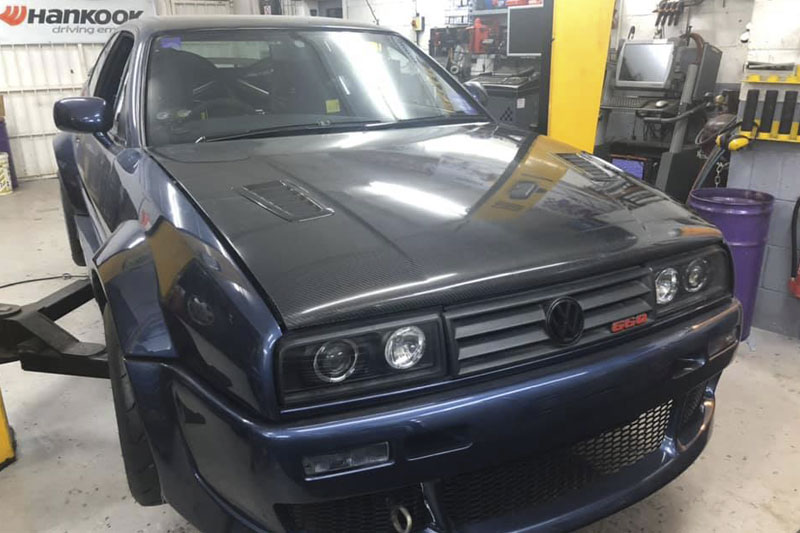
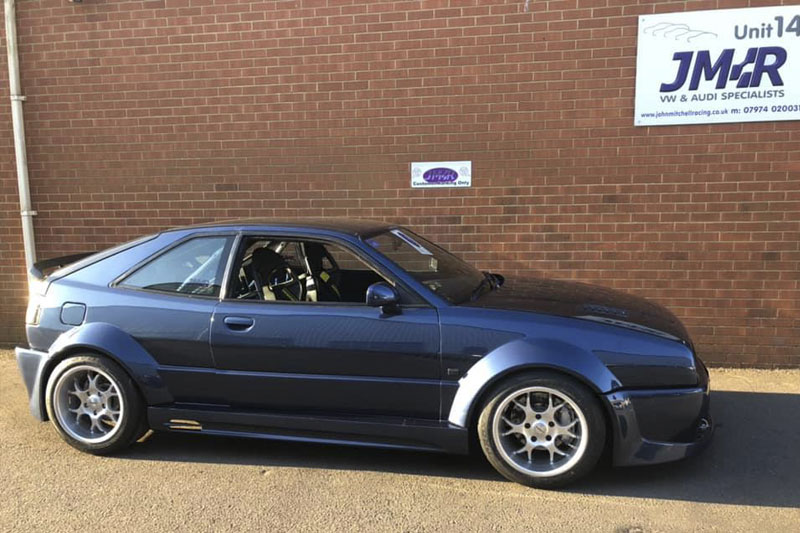
We are all familiar with the Reiger GTO Corrado kit, but this had been done and really was not a look i desired. After hours searching the net i happened on upon a Berg Cup type kit which had possibilities. The arch design was perfect, with side pods that worked well to tie in, however the rear bumper was going to need work to loose the Richard Grant 80’s look. The front bumper although much altered from stock, appealed and with some additional work would sit right with design and function. The kit is the Corrado Wide Racer and according to the supplier, mine would be the only one in the UK, I like to be different.
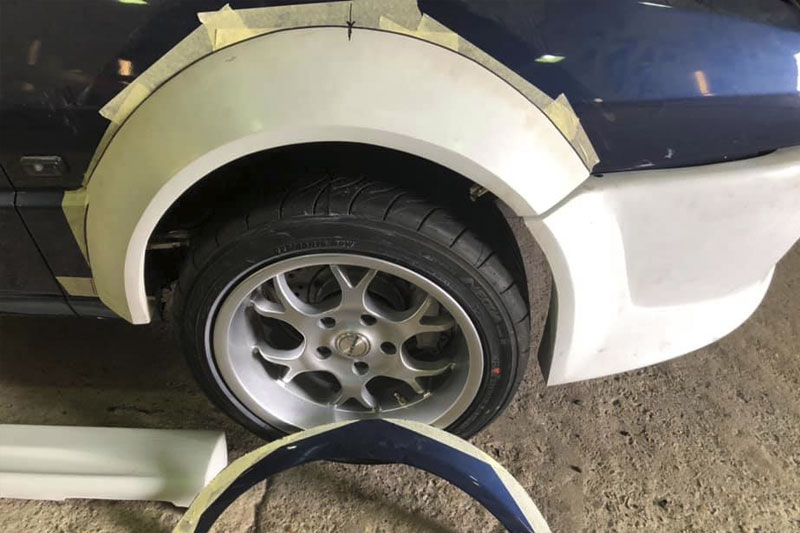
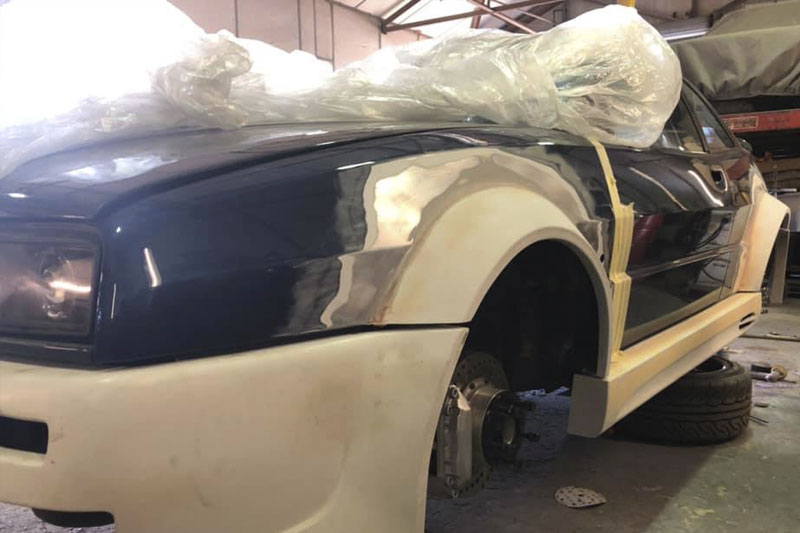
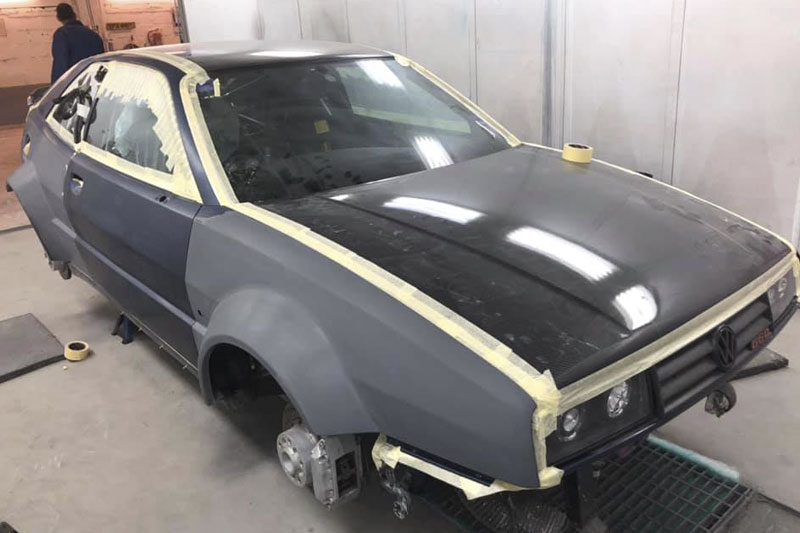
The kit arrived in a very large box and on first inspection, it was clear that much work would be required to make a decent installation from it. It was not bad, but it was a raw product needing pro installation. So next up was to get my Corrado down to our bodyshop, Everymans Garage Chichester and talk through the install with Chris. A plan was made and i began the prep, stripping away the front and rear bumpers, Calibra side skirts and removing the bumper mounts which were to be retained. Chris then mocked up the body kit onto my Corrado and for the first time we had an impression of the future look.
Phase 2
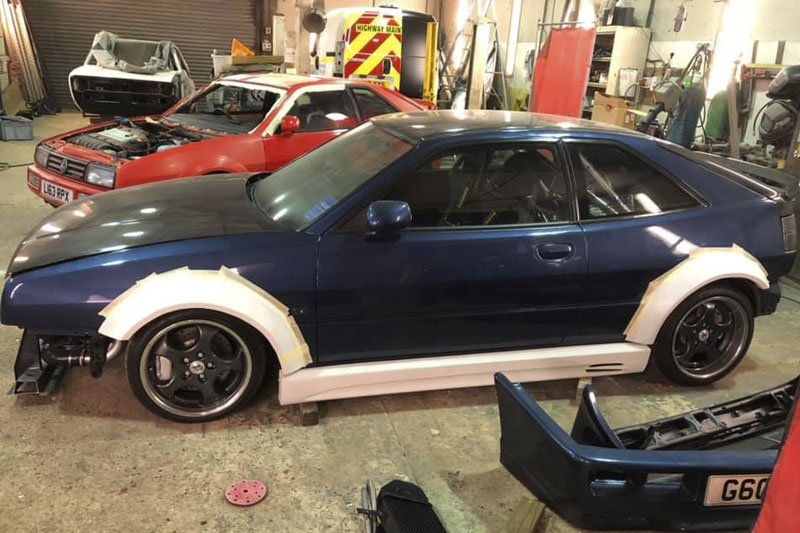
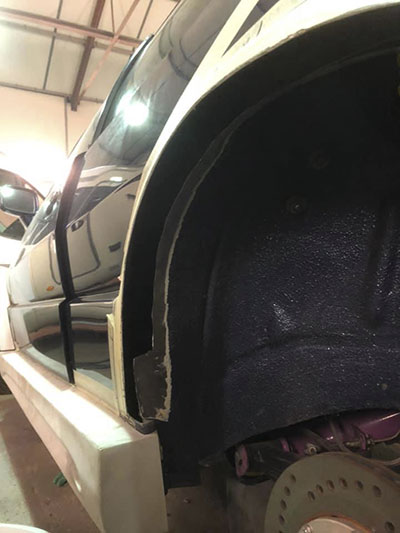
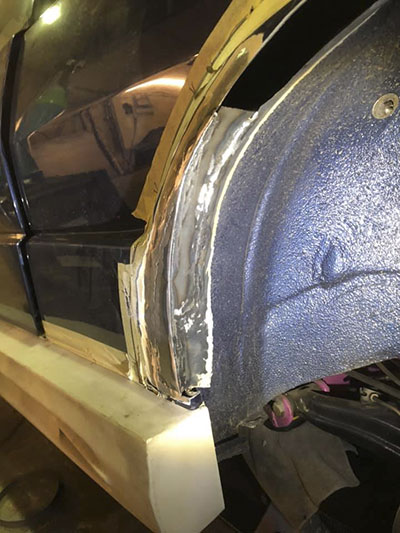
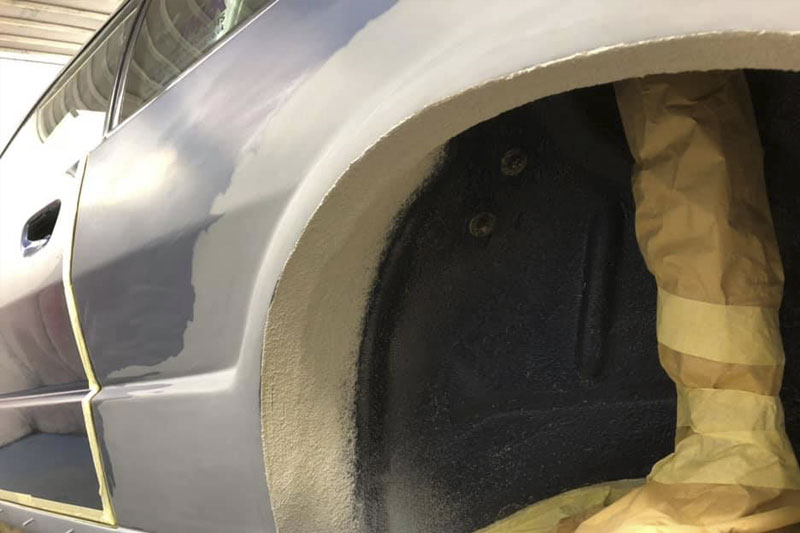
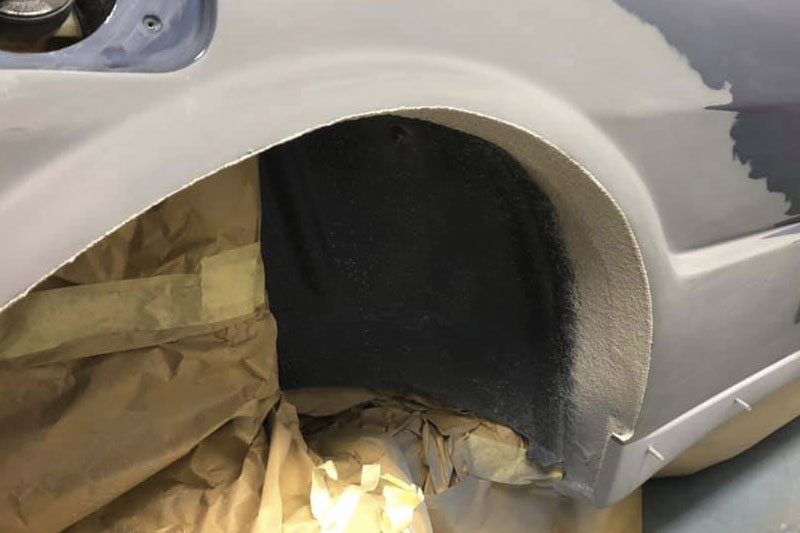
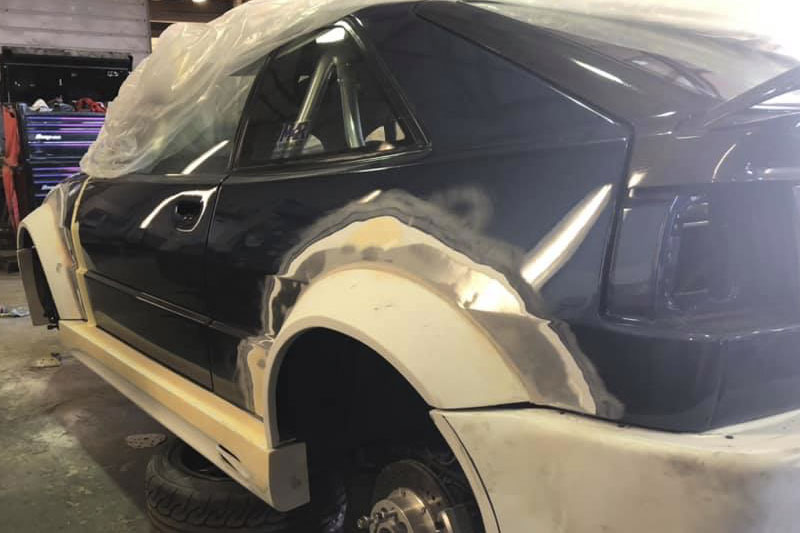
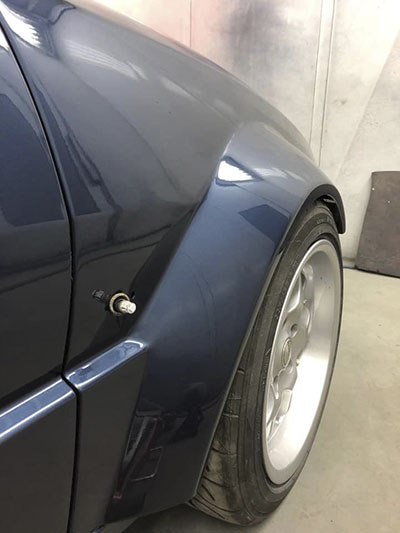
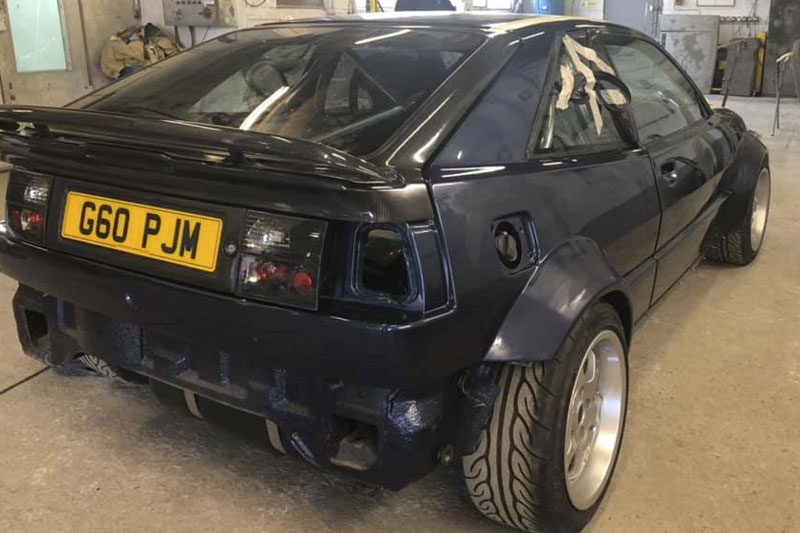
This is when the serious work started and also some serious thinking about what was soon to happen. Part of fitting this kit was to involve permanent alteration to the bodywork, from which there was no turning back. In order to properly fit the extended wheel arches, the existing stock arches would have to be cut back, in order to offer the required wheel fit snd clearance. So, with the front wings it’s a pretty straight forward task, they being a single skin panel. The rear arches are a very different proposition, being double skinned and once cut, would need to be “tubbed” ( a fabrication process to re-join the inner and outer skins, by welding in a custom fabricated web of steel). Clearly, to reverse this process would take a shocking amount of man hours. I was sure that this was the way to go and so the extended arches were offered up, trimmed to profile, the arches were cut out and fabrication works completed. The extended arches were now able to be positioned and offer true reference for the remaining kit components.
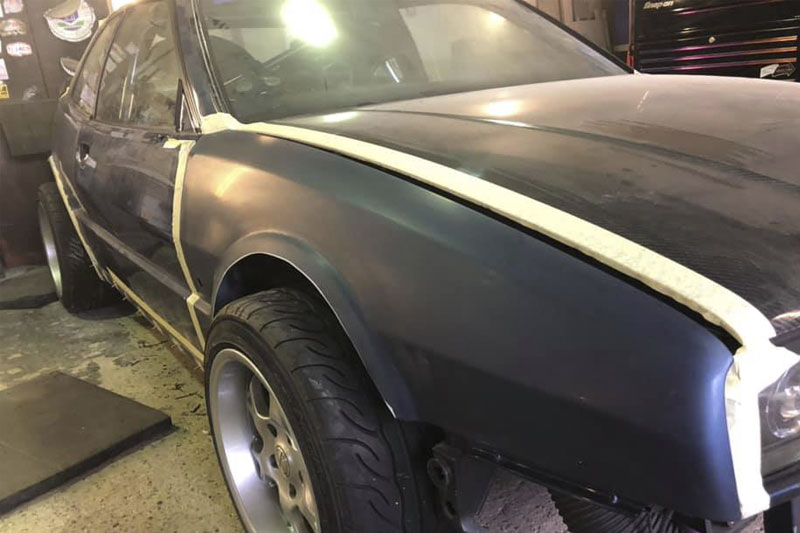
Before the extended arches were attached to the body, Chris primed and painted to colour, the modified steel bodywork of each arch. This was to ensure that none of the steel bodywork, covered by the extended arches, would be exposed to corrosion.
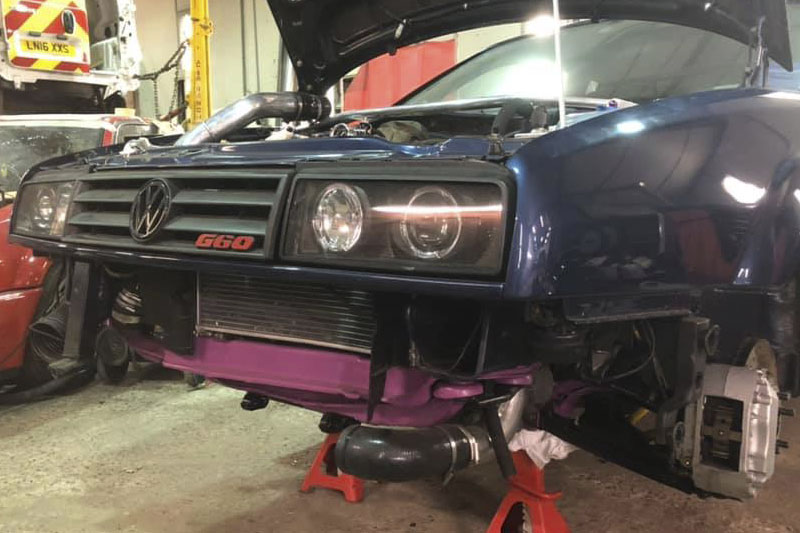
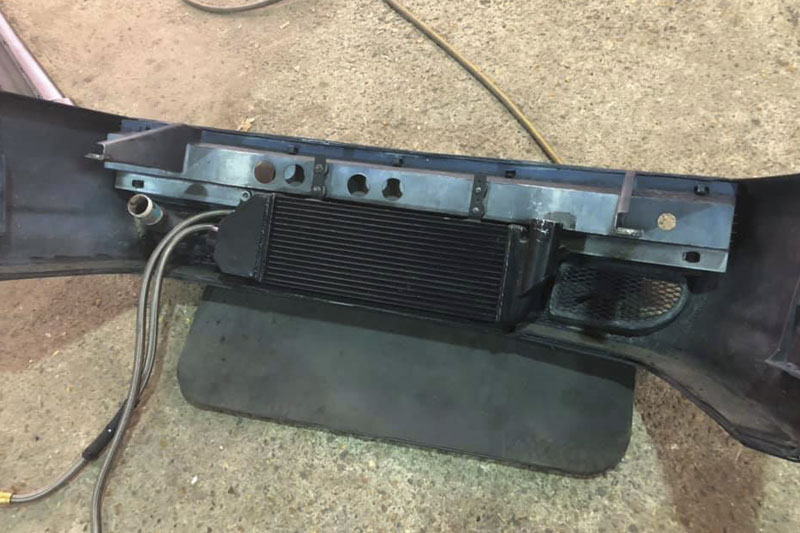
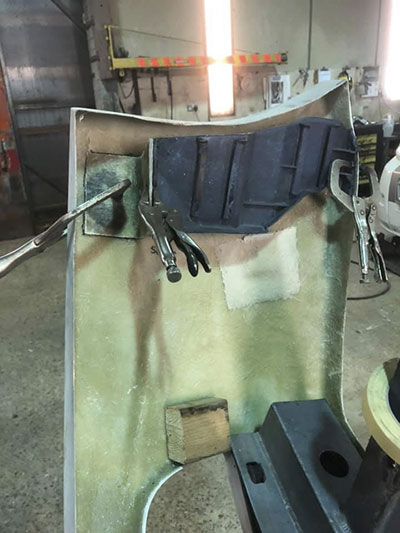
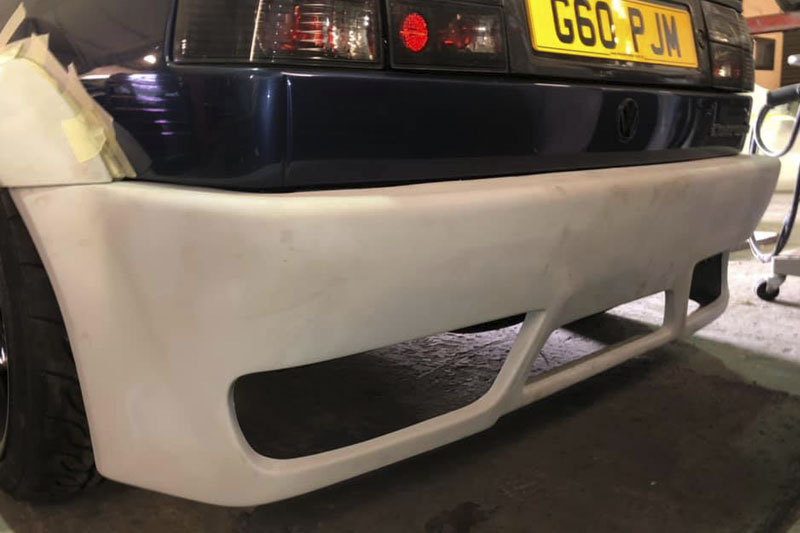
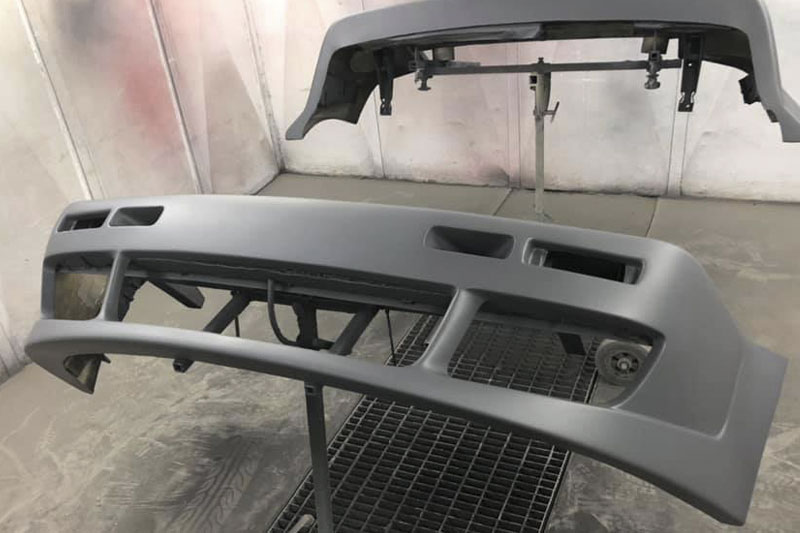
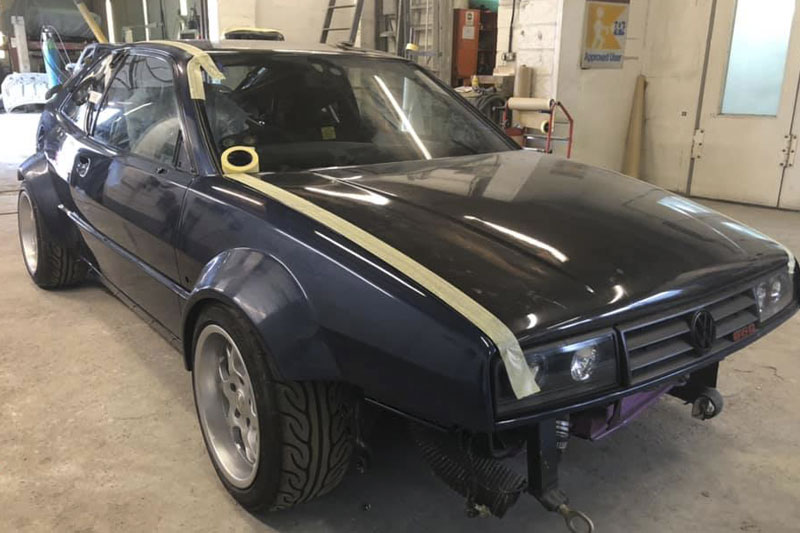
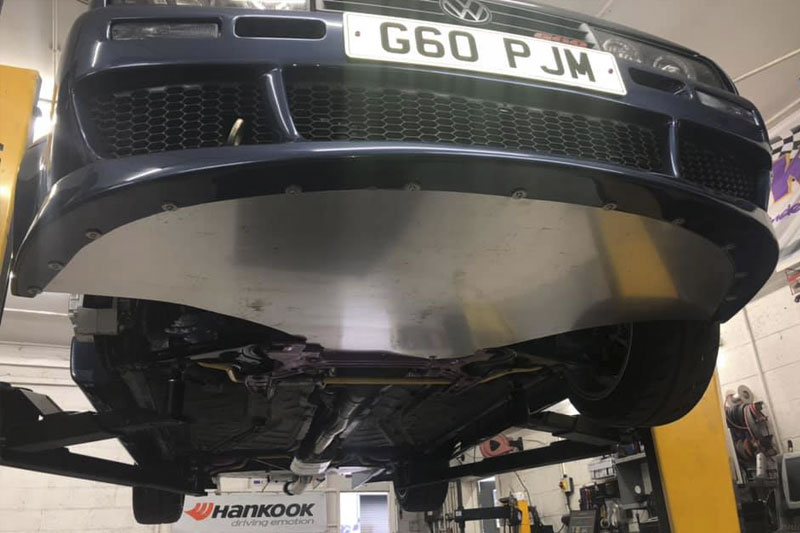
Next up was the new front bumper. This task was made alot more straight forward, by the previous works carried out by myself to fit the previous RS2 style bumper. The kit supplier intended for the bumpers to be mounted by brackets and adhesive! Not at all acceptable in my view. I had extracted the impact absorbing packing from both bumpers and re-styled it to fit within the new bumper. This packing also provides the attachment points for the bumper irons, which in turn and in conjunction with installation of the side slider mounts, allow OEM type fitment and removal of the bumpers. The front bumper iron, furthermore, i had previously fabricated out of aluminium and was made to act as an air duct for cooling of the radiator. To complete the modifications on the front bumper, we grafted in a pair of front air ducts, to feed air into the modded bumper support.
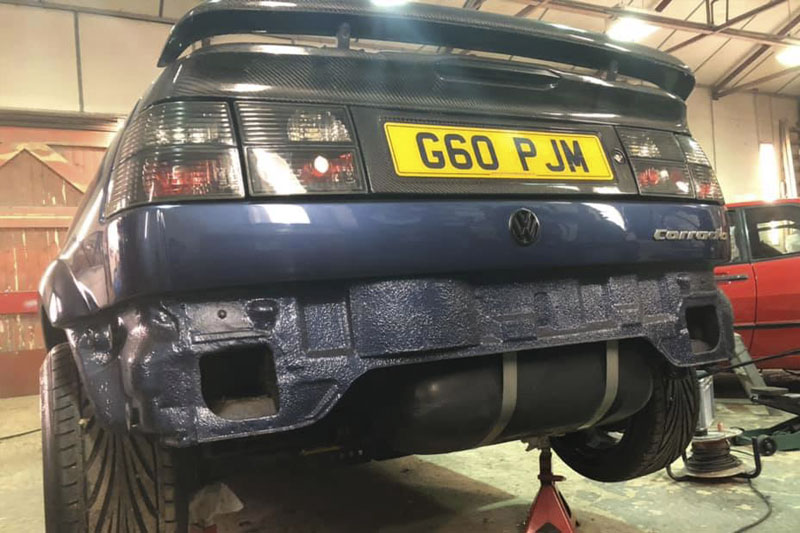
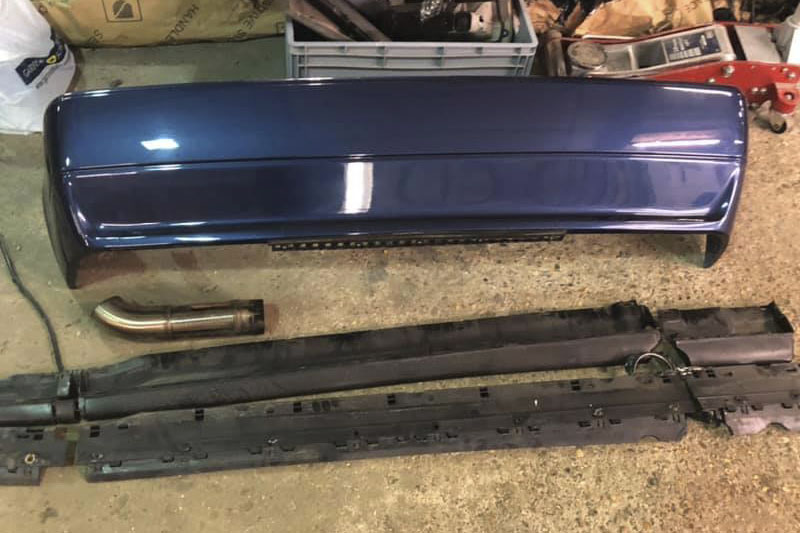
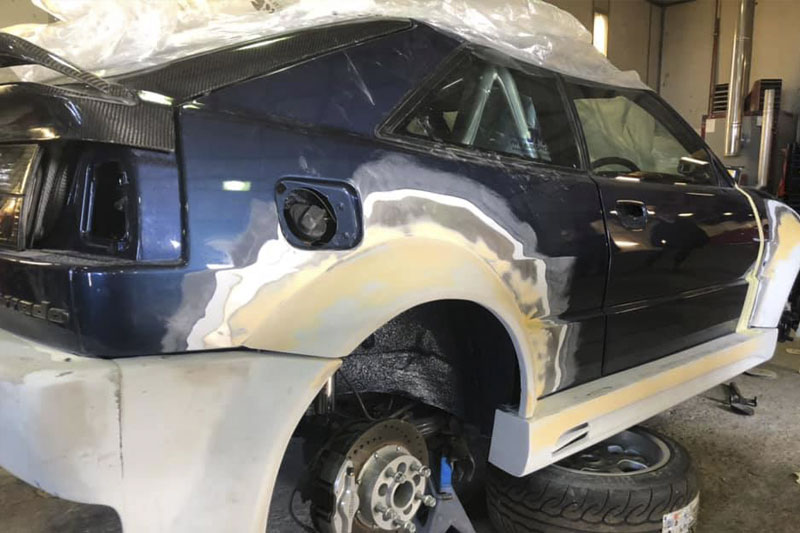
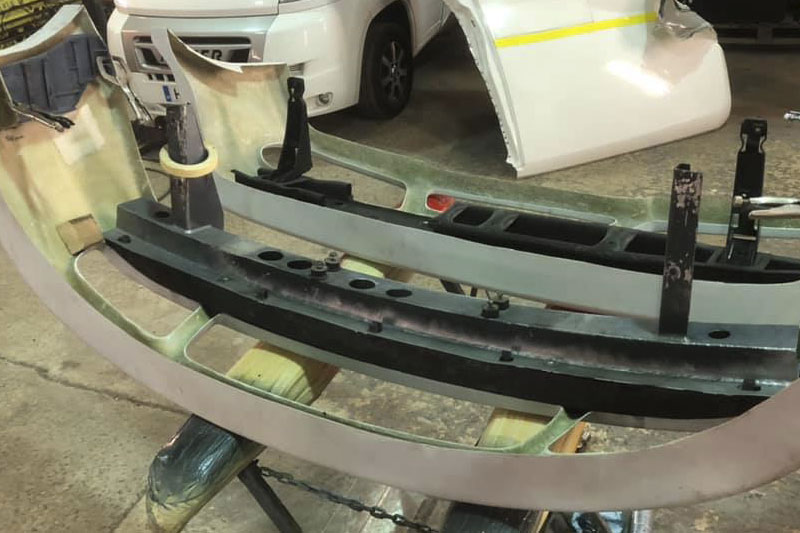
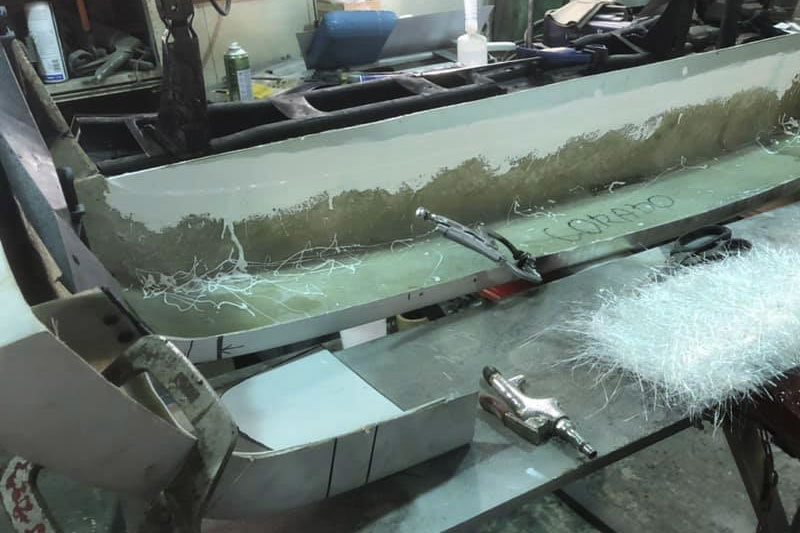
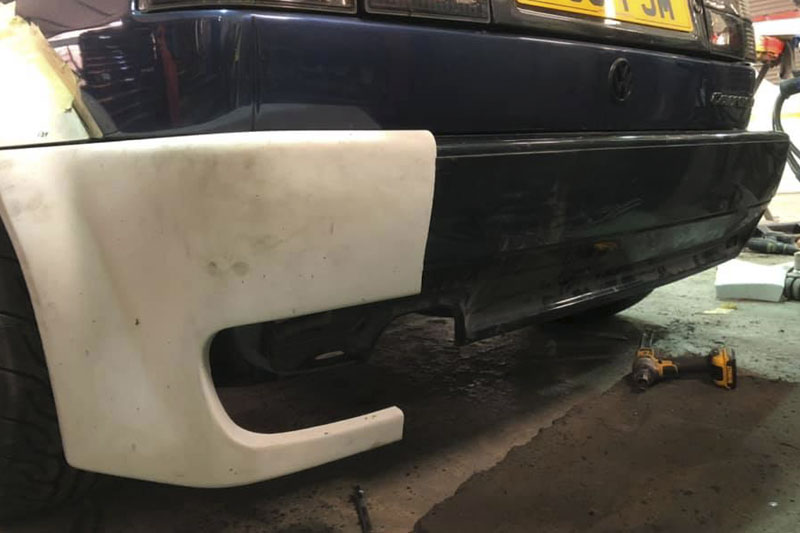
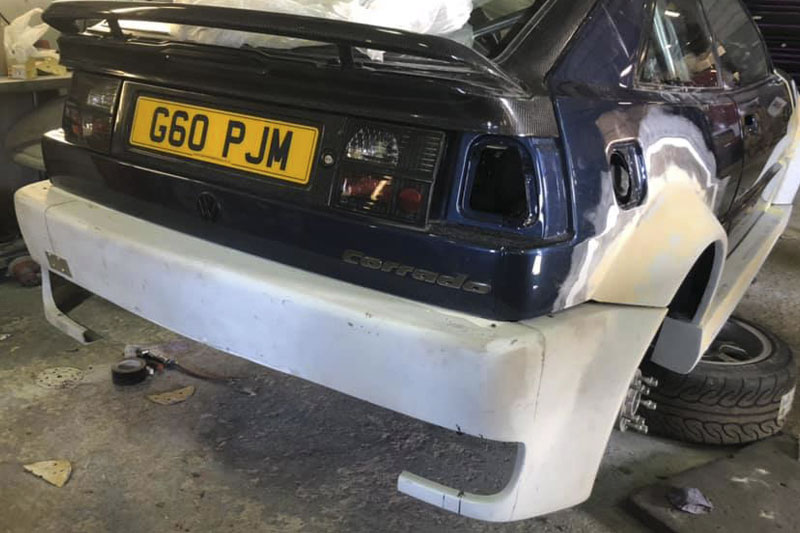
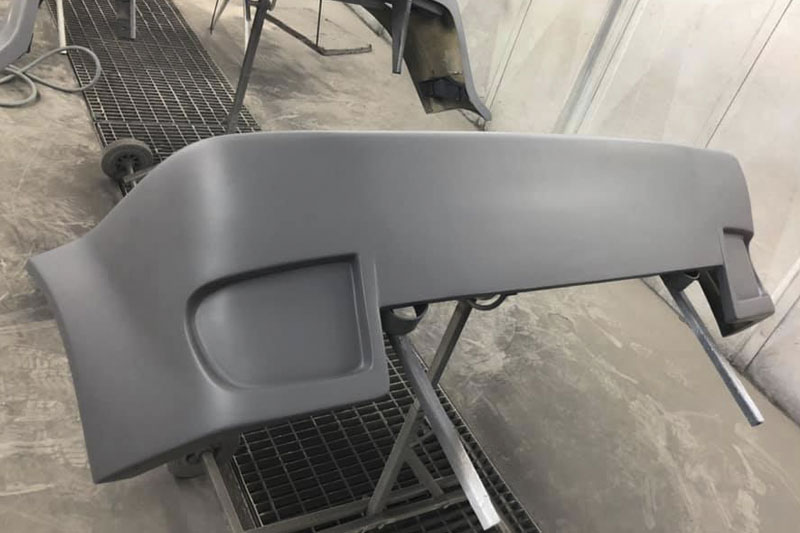
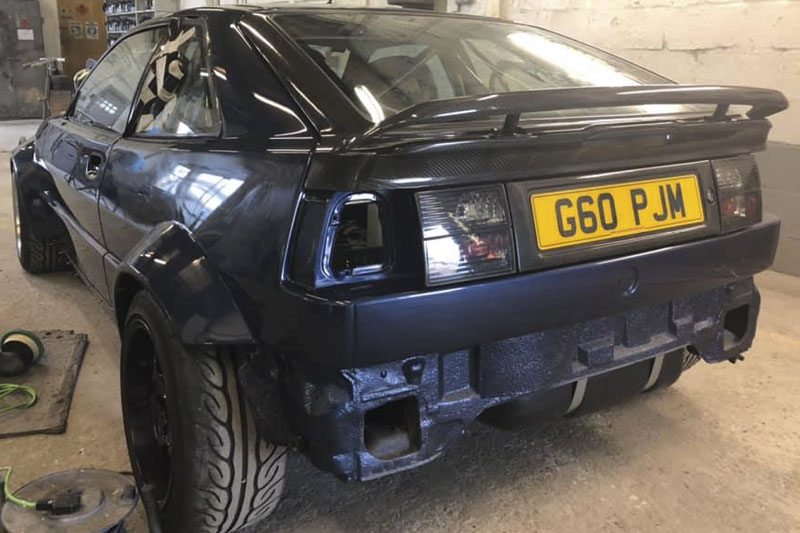
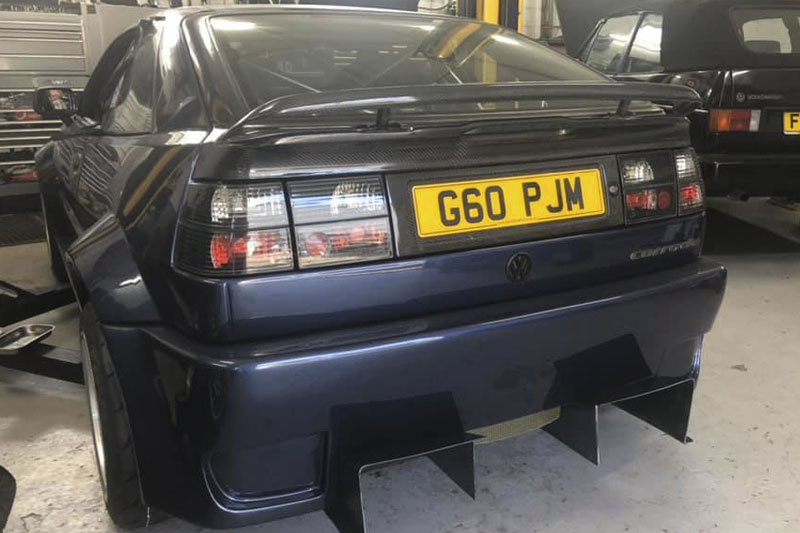
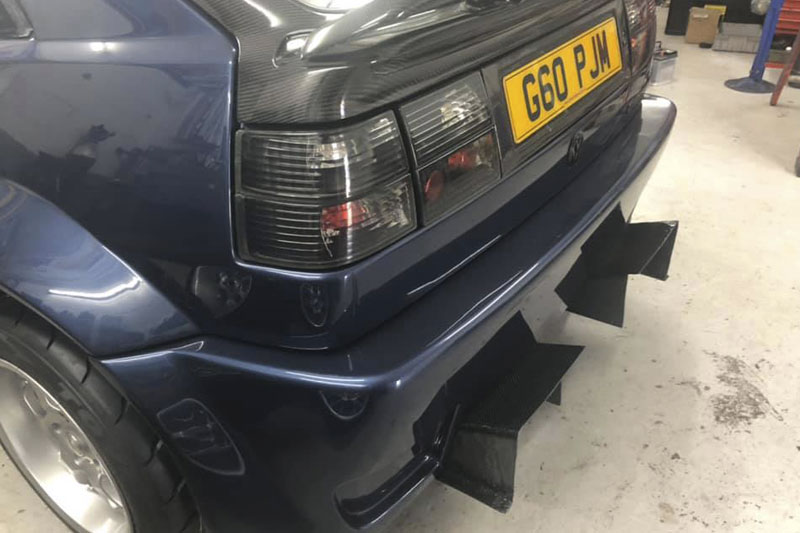
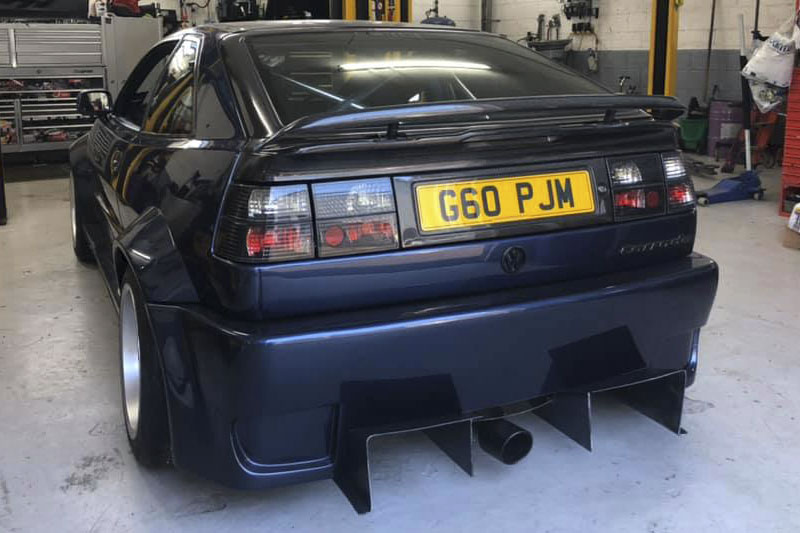
Now we get to the really challenging component, the new rear bumper. As said before, the styling of this item left alot to be desired. I knew i wanted to improve the under chassis aero and part of this was the addition of a full depth rear diffuser. Chris and i played with various ideas on the styling of the rear bumper and the incorporation of the diffuser. At one stage Chris was going to fab’ an aluminium diffuser, but this was not required due to a chance option on a carbon fibre unit. I found a diffuser that was originally made for a Radical and was no longer required. Postage was arranged and the part was perfect, could have been made for my car. Attention then turned to the fit of the kit bumper. It came to our attention that the bumper was good shape on the offside, but the nearside shape of the arch return was well out. Chris put in a great deal of time correcting this issue and then to infill the rear vents. The bumper was a real issue to sort out and get right, but none the less Chris squared this away.
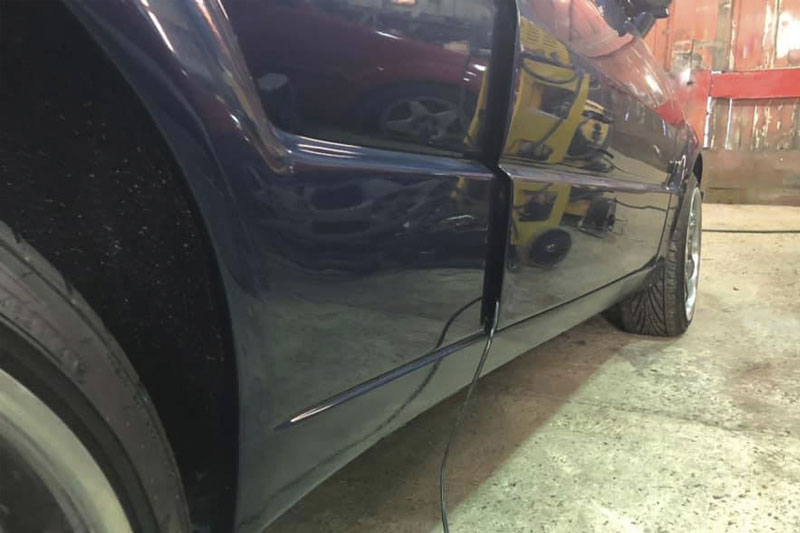
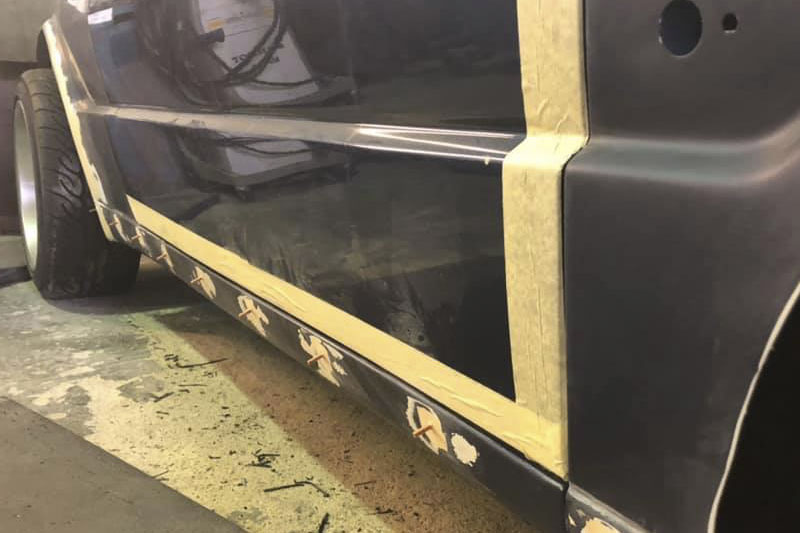
The side pods again were intended to be glued onto the steel sills, not at all satisfactory. Done this way they would have had excessive movement at speed, which would have allowed premature failure and damage. We, after a little thought, went with using a bolt on method, braced with a custom made bracket support structure. Weld on threaded studs were fixed to the car steel sill at regular intervals down both sills. The bracket was fabricated to carry both the side pod and fix to the studs. The end result was a fully removable, solid and secure component, that would not be unstable at speed.

Phase 3
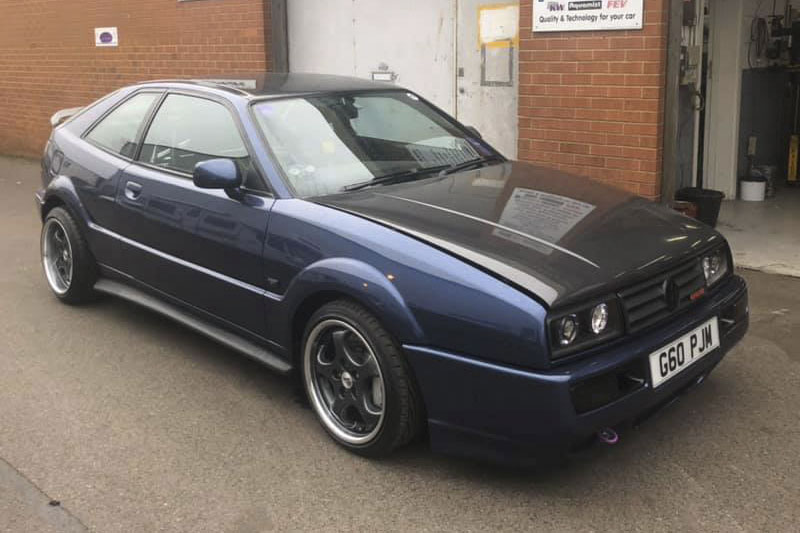
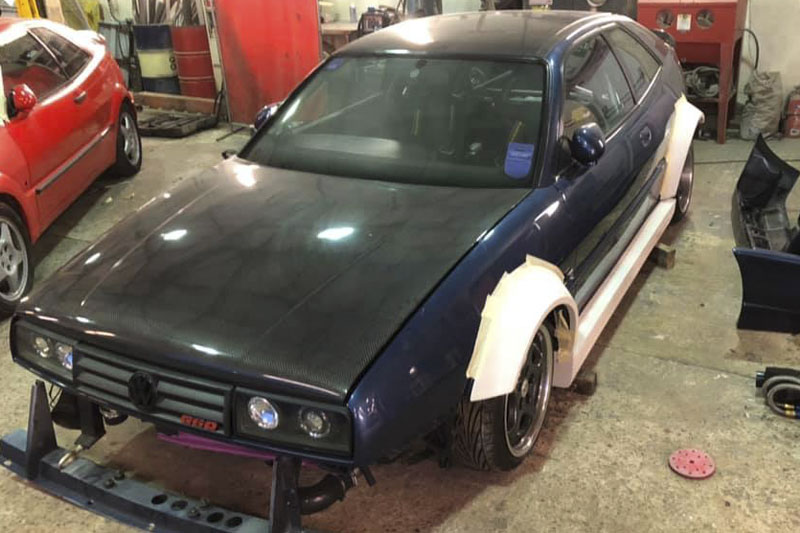
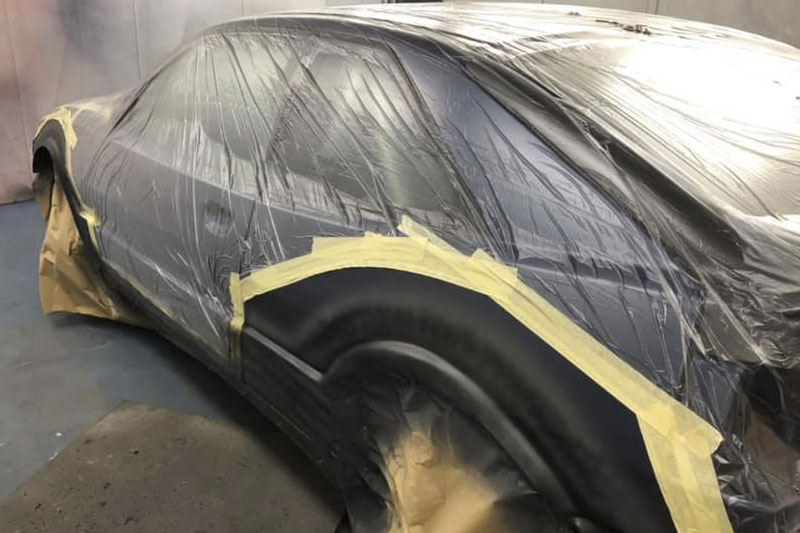
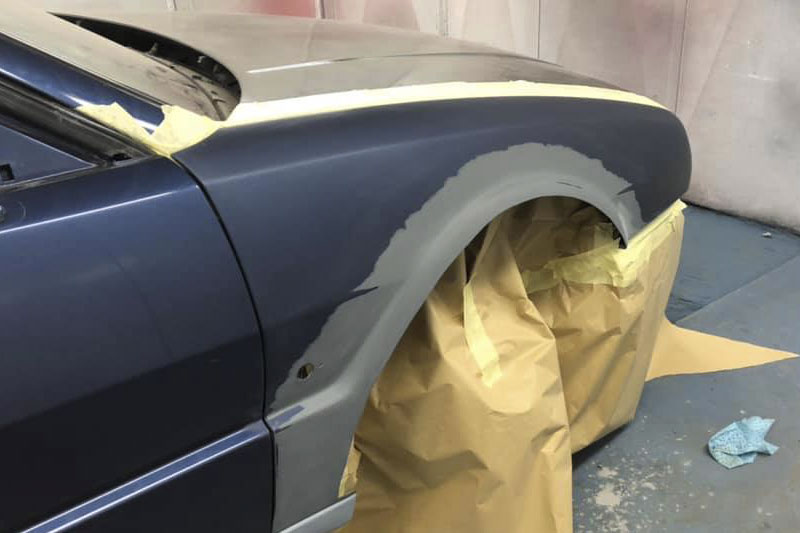
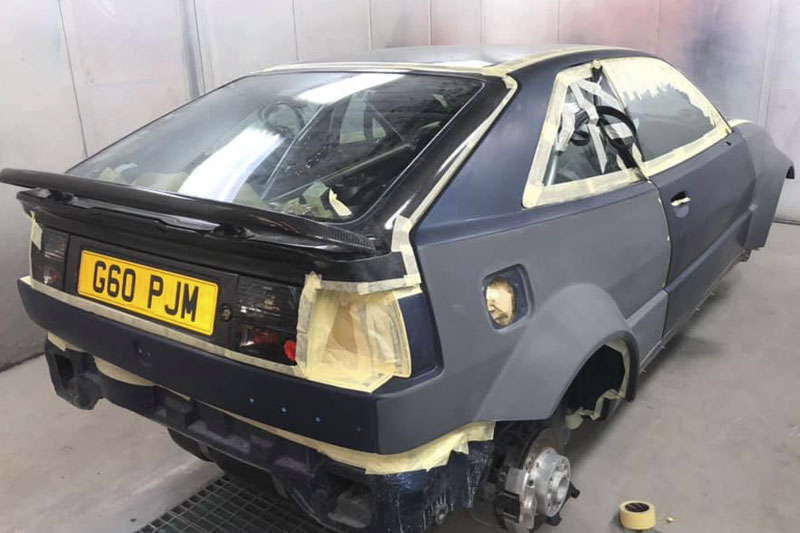
With all the elements of the body kit fettled and modified, where required and fitted to the body, my Corrado was ready for paint.
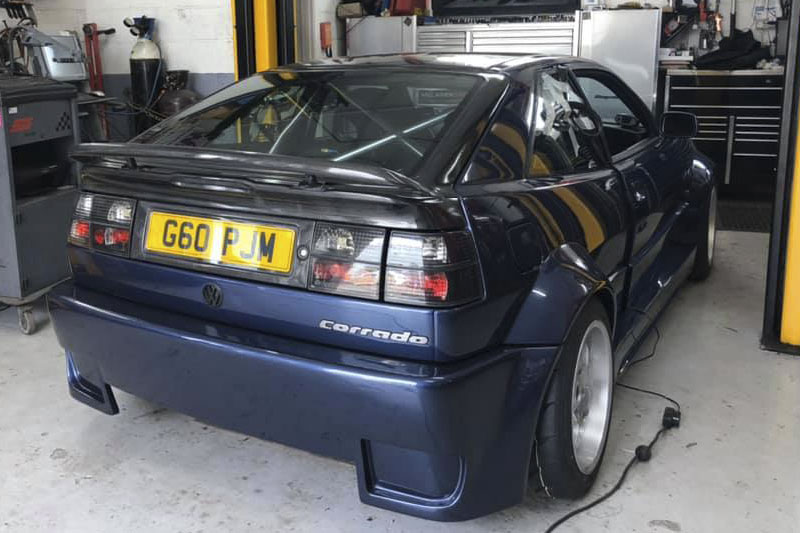
All removable components of the kit were primed and painted off the body, leaving only the bonded arches to be painted in situ. This is always a key moment, as indeed the kit going into colour, makes it truly one with the body and for the first time, we got to see how it was to look. This was no disappointment and my Corrado had morphed into the machine I i had always envisaged.
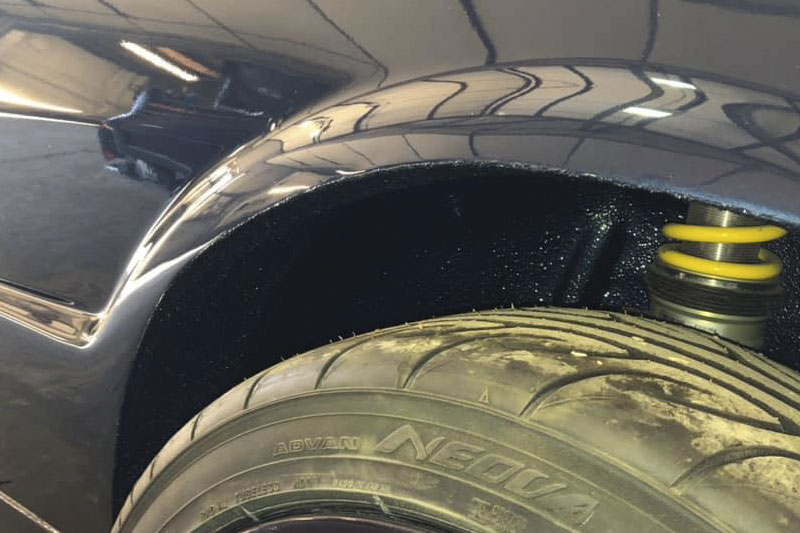
After giving the painted panels a polish, they were fitted back on onto the body and the for the first time we saw the kit fully fitted and in colour. Awesome! Although I would add, that Chris at Everymans, our bodyshop elect, was a right cheeky bugger and wouldn’t send any pics over until I saw it for real, when he delivered it back to our workshops!
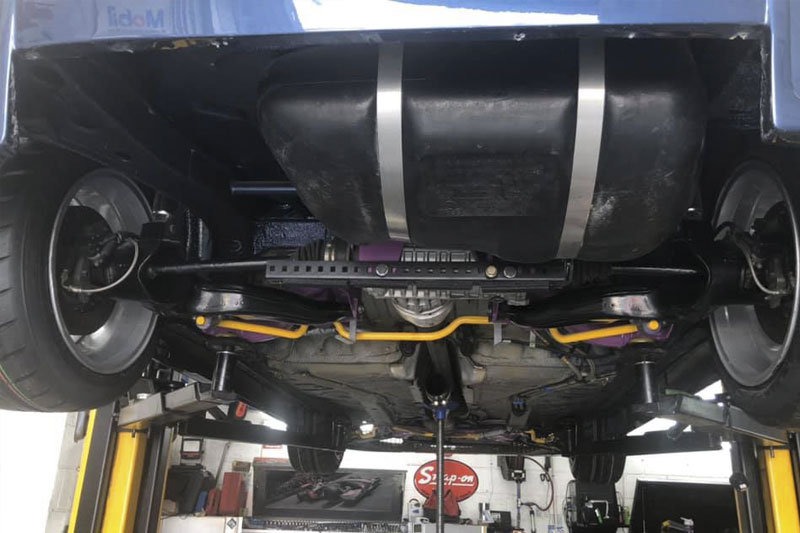
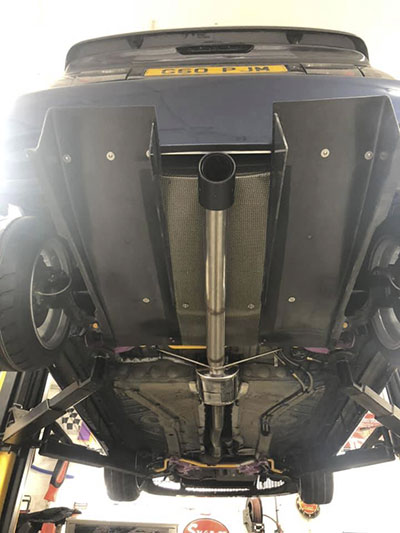
Then final stage of this wide arch conversion was to incorporate all the other aero features we had generated to complete the upgrade, these being the rear diffuser and engine undertray. We also needed to fabricate a new rear section for the exhaust, to replace the previous side exit system.
The rear carbon fibre diffuser required the fabrication of new supporting brackets, to secure it at the rear to the bumper and at the front to the rear beam. These brackets were fabricated in house from aluminium and position the diffuser securely.
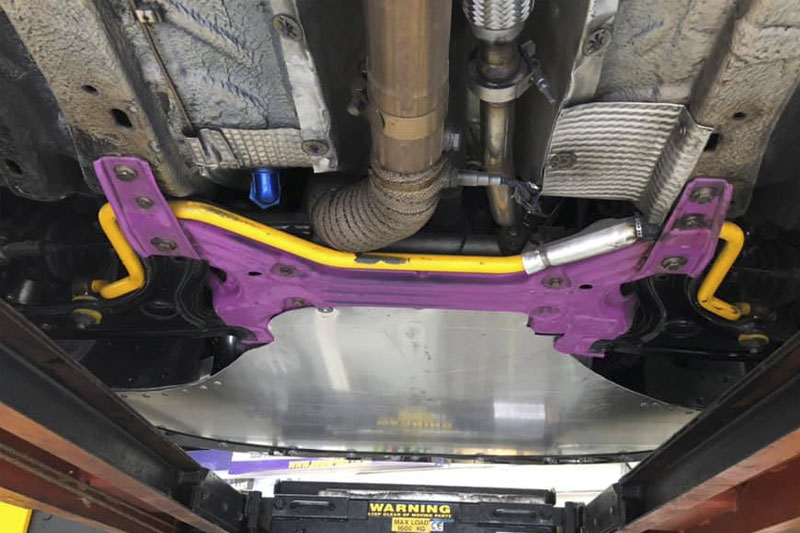
The front engine undertray was fabricated from 1mm aluminium sheet, having first made a card template. The tray was cut from the sheet with our plasma cutter and then hand finished. The tray was then secured in position using expanding rubber tube nuts with stainless bolts, into the lower edge of the bumper return and stainless bolts into threads cut into the front subframe.
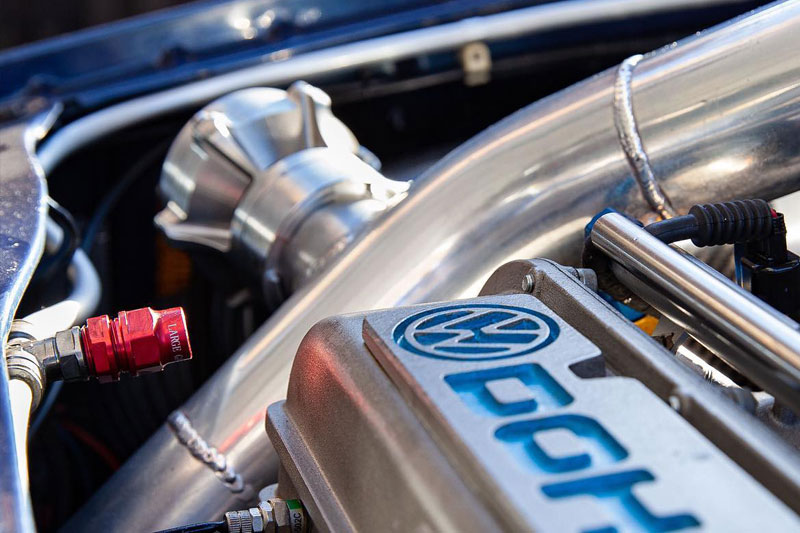
The exhaust, we selected a new centre resonator and continued the 3” stainless steel system through the centre axis, exiting through the centre of the diffuser. Hangers were fabricated and TIG’d in position and a Milltek carbon fibre tip was fitted to finish the exhaust.
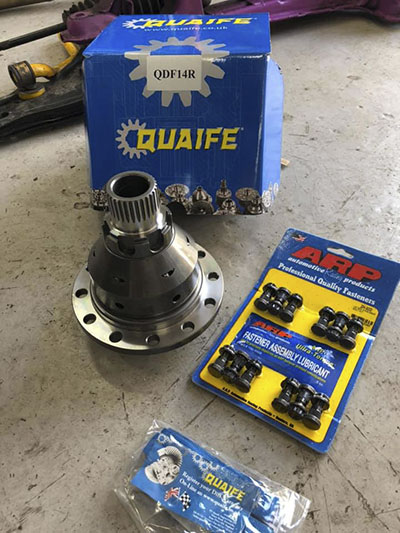
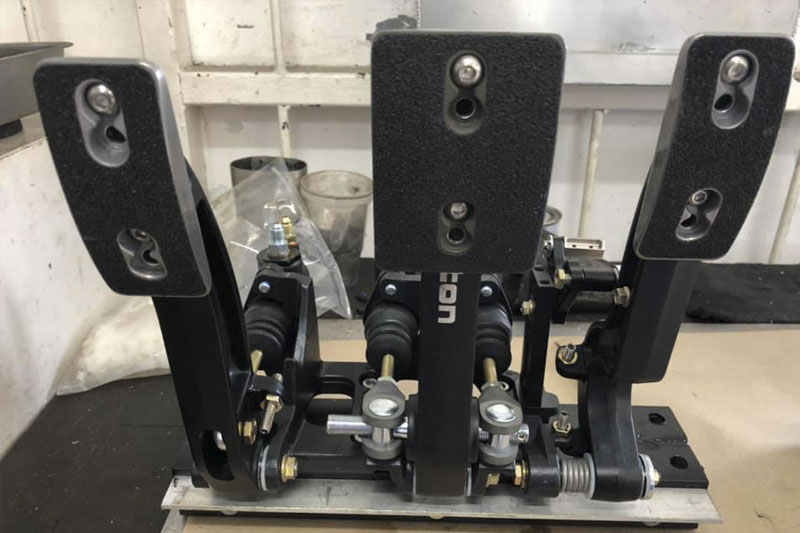
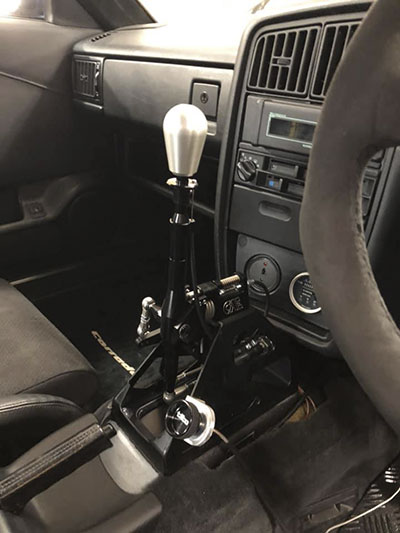
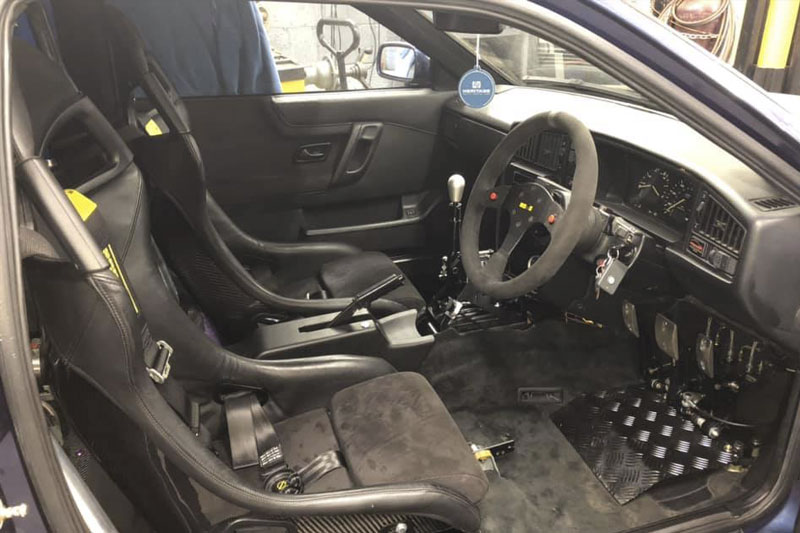
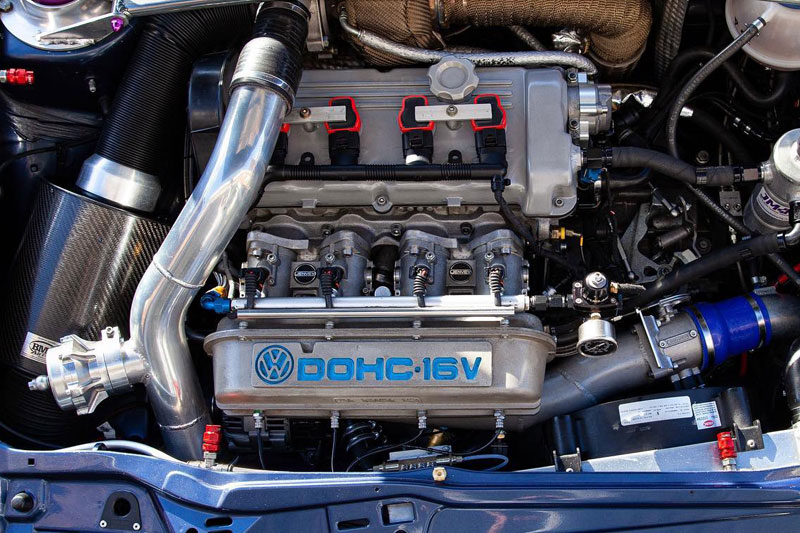
Now with the ability to get more rubber on the road, using the new Borbet BS 9.5x16’s with R888 tyres, this would be an ideal moment to enhance the power delivery, by way of some carefully selected engineering components. First up was a Quaife ATB limited slip diff. Second, with the transmission iut of the way it was snd ideal time to remove the somewhat disappointing OBP Motosport pedal box and replace it with the far superior Tilton 3 pedal boxes. Thirdly, we had noted from initial test drives that the high amount of torque was having its way with the front lower suspension arm, rear bushes. Even though these were the black race poly units, they were still too soft under such loading and causing torque steer issues. These were replaced with the Powerflex spherical bering tyoe bushes and straight away tgere was a complete transformation in power delivery and torque control. Fourth was a guilty pleasure. I have long wanted a CAE gearshift and again, with the transmission out it was an ideal moment to make this install. The kit was sourced and installed with little effort, just a little thought required in routing the new shift cables. The steering wheel position did then require adjustment and a good quality spacer was fitted to the Momo wheel and this fine tuned the ergonomics.
All was reassembled and each of the chosen engineering enhancements had lifted the response in their specific domain. The Quaife LSD and the spherical bearing bushes had tamed the torque steer, the brake response and front to rear tuning was vastly improved, like a day / night difference in braking ability, the gearshift was now in just the right position and quite simply sublime in operation, not to mention the cosmetic cabin appeal.
All in all my Corrado has finally become the machine I envisaged over 25 years ago, when I laid eyes upon one of the inspirations for this build, a Porsche 968 Clubsport. Clearly the brief grew a little since that moment, but I am so pleased with the resulting machine. I now look forward to many miles of driving pleasure, attending shows and sharing the fun with other like minded enthusiasts.
Our thanks to all those to helped in the re-generation of JMR Wide Arch project build:
Ben Kilford JMR Ltd, Chris & the team at Everymans Body Shop Chichester, Richard Good KW UK Supension, The Wheel Specialist Fareham (My good friend Olly), Joe Clarke Trim Deluxe, Richard Baron Vennom Motorsport.

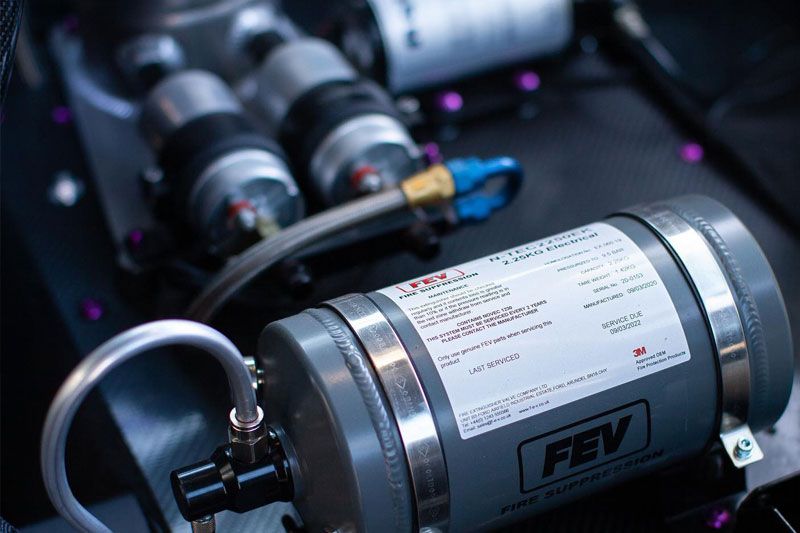
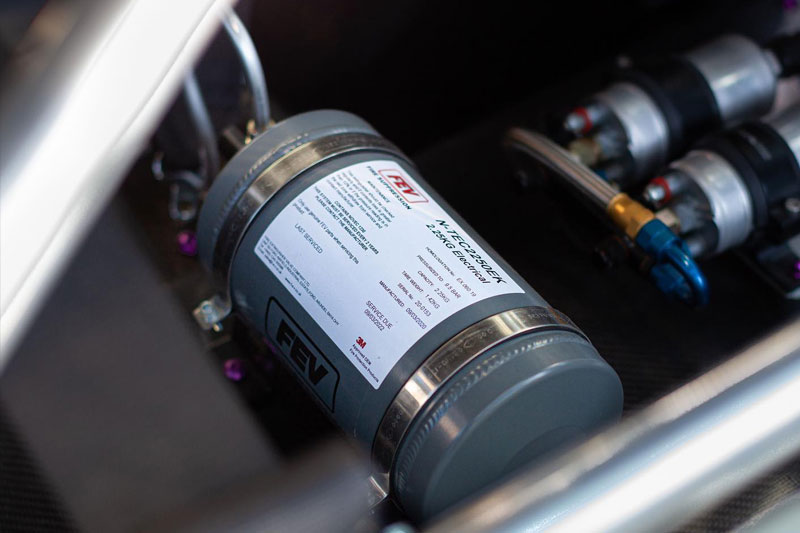
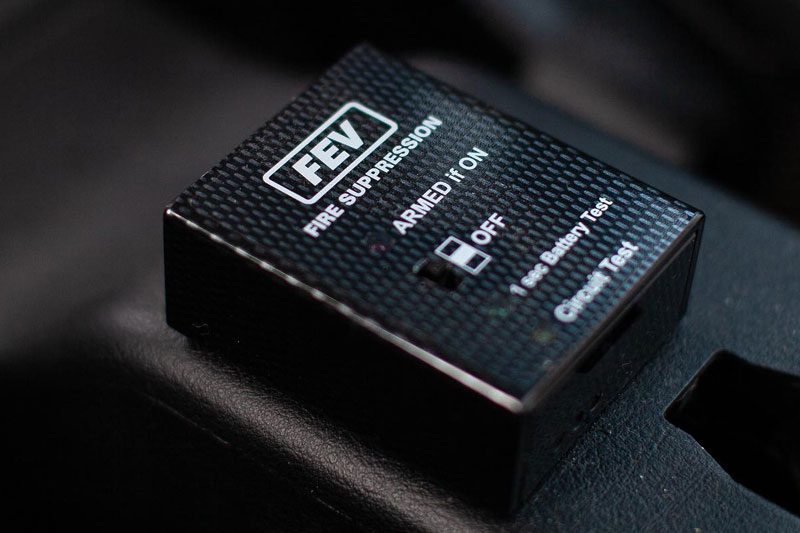
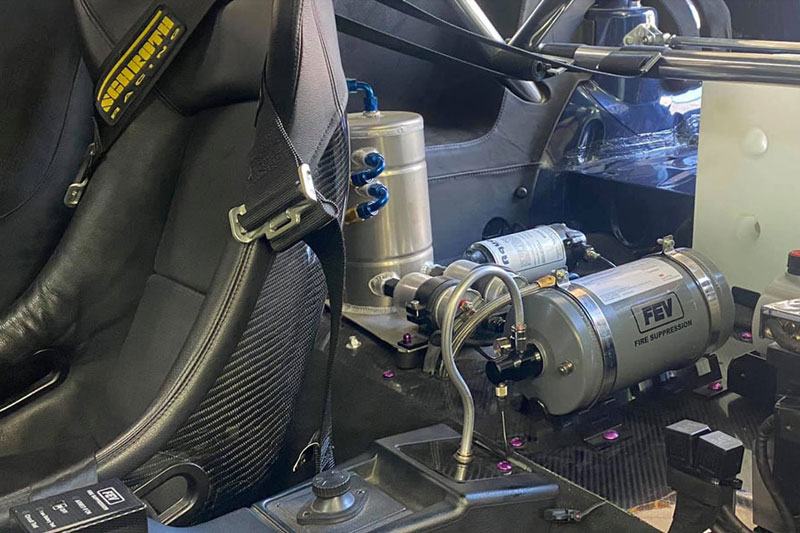
FEV fire suppression installation
Here some photos of the Corrado with an installation of the FEV N-TEC2250EK fire suppression system.
For more information about their products please click here More Info
Workshop - 01903 718684
Mobile (Working hours only) - 07974 020031
Hours of Business:
Monday - Friday: 08:00 - 17:00
Saturday - Sunday: Closed
JMR Ltd (John Mitchell Racing), Units 14 & 15, Arunside Business Park,
Fort Road, Littlehampton, West Sussex, BN17 7QU
We recommend that you approach our premises from the A259. Enter into Lineside Industrial Estate at the new traffic light junction with Eldon Way, and follow signs for Fort Road. You will be directed by signs down Arndale Road past the Builder Centre, through an “S” bend and onward to a “T” junction. At the “T” Junction turn right onto Fort Road keep going straight down until you reach a large yellow security gate. This is Arunside Business park in which we are located. There is a site map at the entrance above the yellow gate, but the site is very small and a single one way road will take you directly to our premises.